
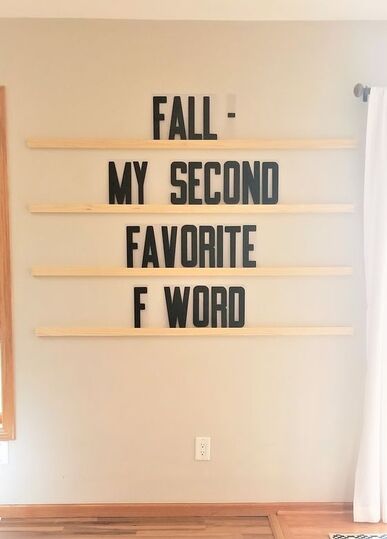
 Something about the change of seasons makes me feel restless. I was starting to get the itch to change up my decor as soon as the temperature started dropping. I would love to change all of my decor out with each season but I don't think there's a person on this Earth who has the time or energy (or budget!) to get that done. That is what makes this project perfect! Very little effort is needed and you can easily change the quote as often as you get the urge to. It also gives me a chance to showcase my favorite type of humor and, because I think I'm hilarious, I know it will bring me lots of giggles (oddly enough, my husband doesn't think I'm as funny as I do). This entire project can be completed for around $100 and in less than 1 hour. Items needed:
Instructions:
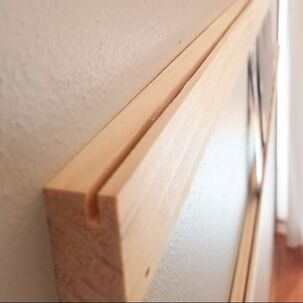
4. Line your first 1x2 up with the marks you made and nail it to the wall. Be sure that the ledge you created with the table saw is facing up. I only used 3 nails per board since the letters are very light. You could use also use heavy 3M strips to attach these to the wall, however, I've had bad luck with tearing up my walls when I want to remove them. Screwing the 1x2s into studs is also an option but I prefer the smaller holes the brad nails leave behind if I ever decide to change the wall again. 5. Double check your measurements for the second 1x2 and nail that into place. Repeat this process until all of your boards are hung. 6. Arrange your marquee letters into the most cheeky seasonal quotes and smirk every time you walk by! 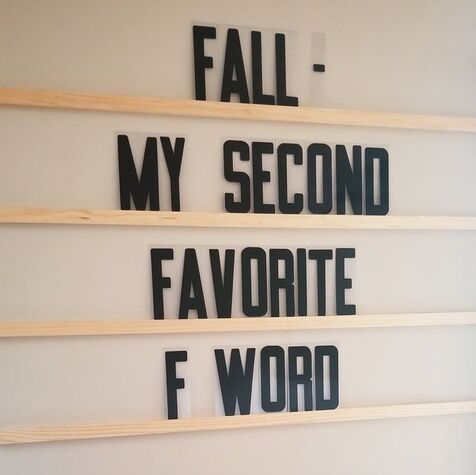
1 Comment
|
Hayley GiesekeDog Mom. Wife. Cold brew connoisseur. Archives
September 2019
Categories |
 RSS Feed